Are you constantly dealing with the challenges of keeping your restaurant clean? Do worries about health inspections and customer perceptions about cleanliness keep you up at night?
The cleanliness of your establishment is just as vital as the food you serve. A well-maintained restaurant reflects high standards and attention to detail, ensuring customer satisfaction and adherence to health regulations.
This guide delves into the nitty-gritty of thorough restaurant cleaning, covering everything from how to clean restaurant hoods, tables, grease traps and more.
We’ll also guide you through the complexities of deep cleaning, offering expert tips and answering pressing questions, such as how often should you clean dishwashers in a restaurant and more!
Daily Restaurant Cleaning Process
Ensuring your restaurant is as clean as possible for your guests is essential. Daily cleaning is about keeping your space tidy and safe, taking care of the little things that make a big difference in how customers see your restaurant.
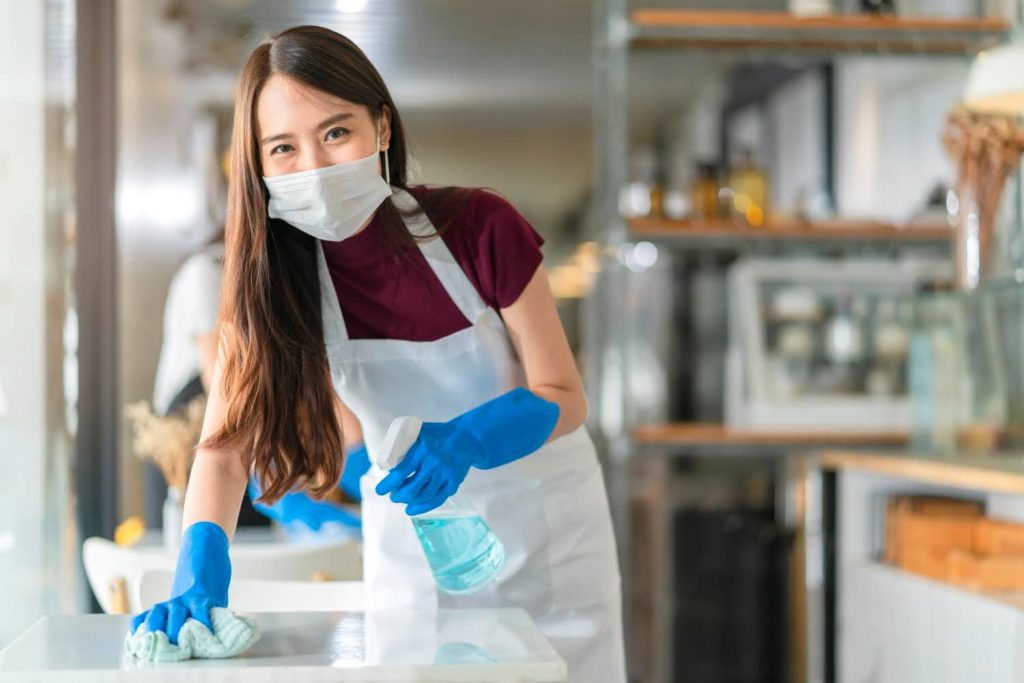
How To Clean Tables In A Restaurant
The cleanliness of your dining area sets the first impression for customers. Daily cleaning of tables is not just a routine task; it’s an important part of your restaurant’s hygiene practice that directly impacts customer perception.
What You’ll Need:
- Microfiber Cloths: Unlike traditional materials, microfiber cloths have a unique composition that allows them to capture dirt and liquid more effectively. Their fine fibres can easily pick up and hold onto microscopic particles, dust, and bacteria, which other clothes might spread around.
Moreover, microfiber is more absorbent, making it ideal for quick cleanups and efficient drying, ensuring surfaces are not just clean but also free from streaks and residue.
- Food-Safe Disinfectant Spray: A quality food-safe disinfectant spray can kill germs and bacteria without leaving harmful residues. It’s essential for maintaining a sanitary environment, especially in areas like the kitchen and dining tables.
- Dry Towels Or Disposable Paper Towels: These are necessary for drying surfaces after cleaning to avoid water spots and to ensure that areas are ready for immediate use.
Dry towels are useful for larger surfaces, while disposable paper towels are convenient for quick, one-time cleanups. They also help maintain a high level of hygiene, as they can be discarded after use, reducing the risk of cross-contamination.
Once you have your cleaning equipment and agents ready, follow the step-by-step guide below to maintain your tables’ cleanliness throughout the day.
1. Immediate Clearing Of Tables
As soon as your guests leave, promptly clear the tables. This involves removing all plates, utensils, glassware, napkins, and any leftover food scraps.
Ensure these items are carefully handled to avoid any breakage or noise that might disturb other guests. This immediate action prevents stains from setting in and makes the cleaning process more efficient.
2. Application Of Food-safe Disinfectant
Once the table is cleared, apply a food-safe disinfectant. Use a spray bottle for even distribution, ensuring that the entire surface area of the table is covered.
This step is crucial for eliminating bacteria or germs from food residue. The disinfectant should comply with health regulations, be safe for surfaces that come into contact with food, and not leave any harmful residues.
3. Effective Cleaning With Microfiber Cloths
After applying the disinfectant, wipe the table with a clean microfiber cloth. The fine fibres in microfiber cloths are excellent for capturing dirt and microbes, ensuring a thorough cleaning.
These clothes also prevent streaks, leaving the table looking polished and presentable. Using a clean cloth for each table is essential to avoid cross-contamination.
4. Drying The Surface
Once you’ve wiped the table, allow the surface to air dry. This step is essential to let the disinfectant do its work. If time is a constraint or to ensure no moisture is left behind, which can be unappealing to new guests, use a separate dry cloth or disposable paper towel to gently dry the table. Ensure this cloth is dry and clean to maintain the highest hygiene standards.
5. Regular Replacement of Cleaning Materials
To maintain consistent cleanliness, regularly replace or clean the microfiber cloths and ensure the disinfectant spray is refilled as needed. This practice prevents the spread of germs and maintains the effectiveness of your cleaning process.
How To Sanitise High-Touch Surfaces In Your Restaurant
High-touch areas such as door knobs, light switches, and condiment dispensers become hotspots for germs and bacteria. Daily sanitisation of these areas is crucial to prevent cross-contamination and maintain a safe dining experience for your guests.
What You’ll Need:
- Commercial-Grade Disinfectant: A high-quality, commercial-grade disinfectant is vital for thoroughly sanitising tables. It should be capable of killing a broad spectrum of bacteria and viruses while being safe for use on surfaces that come into contact with food.
Select a product that complies with health regulations and is effective against common pathogens.
- Spray Bottles: Using spray bottles for disinfectants ensures even coverage on the table surfaces. It allows for more controlled application, reducing waste and ensuring that all table areas are adequately treated.
- Microfiber Cloths or Disposable Paper Towels: Microfiber cloths are highly recommended for superior cleaning. They are more absorbent than standard cloths, can pick up and hold more dirt and bacteria, and do not leave streaks, ensuring a polished finish.
Disposable paper towels are a good alternative for operations focused on hygiene and preventing cross-contamination. They can be used for a single cleaning and then discarded, ensuring each table is cleaned with a fresh, uncontaminated towel.
- Disposable Gloves: Wearing disposable gloves during cleaning protects your staff from direct contact with cleaning chemicals and any potentially harmful pathogens on the tables. Gloves should be changed regularly to prevent cross-contamination between cleaning tasks or areas.
Follow the detailed procedure below on sanitising high-touch surfaces in your restaurant.
1. Preparation of the Disinfectant Solution
Start by selecting a commercial-grade disinfectant effective against a wide range of pathogens. Mix the disinfectant with water following the manufacturer’s specified dilution ratio, which is crucial for its effectiveness and surface safety. Prepare this solution in a well-ventilated area to minimise inhalation of fumes.
2. Application of the Disinfectant
Fill a clean spray bottle with the diluted disinfectant. Evenly apply it across all high-touch surfaces, such as door handles, countertops, menus, and table surfaces, ensuring complete coverage without over-saturating the surfaces.
3. Disinfectant Contact Time
Allow the disinfectant to sit on the surfaces for the duration the manufacturer recommends. This dwell time is essential for the disinfectant to neutralise germs and bacteria effectively. Ensure the area remains undisturbed and prevent staff and customers from contacting the wet surfaces during this period.
4. Wiping and Drying
After the recommended contact time has passed, use a clean microfiber cloth or disposable paper towel to wipe off any remaining disinfectant. Microfiber cloths are highly absorbent and effectively remove residual dirt and microbes without leaving streaks. If using disposable paper towels, use a fresh towel for each surface to avoid cross-contamination.
5. Post-Cleaning Precautions
Once the cleaning is complete, wash your hands thoroughly or change gloves before moving to the next task. Regularly inspect and replace cleaning tools like cloths and spray bottles to maintain high hygiene standards.
How To Maintain Clean Floors In Your Restaurant
Restaurant floors require daily care to stay presentable and hygienic. Given the foot traffic in restaurants, it’s vital to have a floor cleaning process that removes dirt and reduces slip hazards, keeping your space spotless and safe.
What You’ll Need:
- Broom And Dustpan: These are fundamental for preliminary floor cleaning. Before mopping, sweeping with a broom helps remove larger debris and dust, preventing these from spreading or making the floor more difficult to clean.
- Mop Bucket With Wringer: A mop bucket equipped with a wringer effectively controls the amount of water and cleaning solution used on the mop, which is essential for preventing overly wet floors that can be a slipping hazard.
- Microfiber Mop Or String Mop: Microfiber mops are excellent for trapping dirt and are gentle on various floor types, while string mops, with their absorbent strands, are effective for cleaning larger or heavily soiled areas.
- Floor Cleaning Solution Appropriate For Your Flooring: Using the correct cleaning solution is crucial. Different floor types (like hardwood, tile, or laminate) require specific solutions to prevent damage and ensure thorough cleaning.
- ‘Wet Floor’ Signs: These are important for safety. Placing ‘Wet Floor’ signs alerts staff and customers to potential slip hazards during and immediately after floor cleaning, reducing the risk of accidents.
Once you have the right cleaning equipment and agents ready, follow this step to clean your restaurant floor.
1. Thorough Sweeping
Start by thoroughly sweeping the entire floor area with a broom. Pay special attention to corners, under tables, and other hard-to-reach areas where debris, food particles, and dust accumulate. This initial step is crucial to removing larger debris and dirt, ensuring a more effective mopping process.
2. Preparing The Mop Bucket
Fill your mop bucket with warm water, which is more effective in dissolving dirt and grime. Add the appropriate amount of floor cleaning solution as recommended by the manufacturer. Ensure that the solution is suitable for your type of flooring to avoid any damage.
A mop bucket with a wringer is preferred to control the moisture on the mop, which is essential to avoid over-wetting the floor.
3. Methodical Mopping
Begin mopping from one end of the restaurant, working towards the exit to avoid walking over freshly mopped areas. Dip the mop into the bucket and wring it well to remove excess water. Clean the floors systematically, covering all areas and periodically rinsing the mop to remove accumulated dirt.
Using a string mop, replace the water when it becomes visibly dirty to prevent dirt from spreading. For microfiber mops, change the mop head frequently for optimal cleaning.
4. Use ‘wet Floor’ Signs
As you mop, place ‘wet floor’ signs in visible areas to alert patrons and staff. This is essential to prevent slips and falls, ensuring safety. Keep the signs in place until the floor is completely dry. It’s vital to cover all areas where the floor is wet, not just the sections where active cleaning occurs.
5. Final Touches And Drying
After mopping, allow the floors to air dry completely. Use a dry mop or microfiber cloth to remove excess water in areas that take longer to dry. This step is essential to ensure the floor is safe and prevent water spots or streaks.
Weekly Cleaning Maintenance For Restaurants
At the end of each week, it’s time for a deeper clean. This is when you focus on the bigger jobs that keep your restaurant looking good and working well, ready for another busy week.
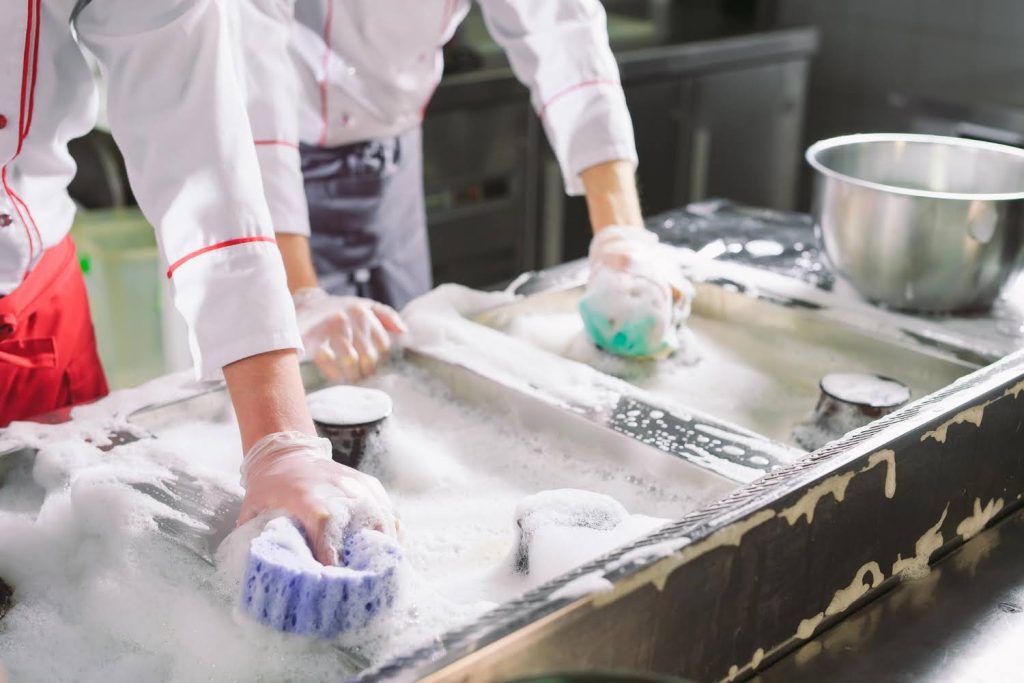
How To Clean Dishwashers In A Restaurant
Your dishwasher is as important as your chef in ensuring the customer’s satisfaction with their dining experience. Regular cleaning of your dishwasher is crucial to prevent the buildup of harmful bacteria and ensure that your tableware is hygienically clean.
How Often Should You Clean Dishwashers In A Restaurant?
It’s recommended that thorough cleaning be done weekly to prevent the buildup of food particles, grease, and harmful bacteria. This routine guarantees that your dishes are sanitised and maintains the dishwasher’s efficiency and lifespan.
What You’ll Need:
- Non-Abrasive Sponge: For gentle yet effective cleaning, a non-abrasive sponge is crucial for avoiding scratches on sensitive surfaces inside appliances like dishwashers.
- Baking Soda: This natural cleaning agent removes stubborn stains and odours. Its mild abrasive quality helps in tackling tough grime without damaging surfaces.
- White Vinegar: An excellent natural descaler and deodoriser, white vinegar effectively breaks down grease, mineral deposits, and soap scum. It’s also a natural antimicrobial agent, making it great for sanitising.
Once your cleaning materials are ready, follow these steps on how to clean your dishwashers:
1. Inspect And Clear Food Traps
Begin by inspecting and clearing the food traps in the dishwasher. This prevents blockages and odours, ensuring the dishwasher operates efficiently. Remove any bits of food or debris trapped in the filters to avoid them being redistributed onto dishes during a wash cycle.
2. Soak And Scrub Racks And Filters
Remove the racks and filters from the dishwasher. Prepare a hot water and baking soda solution in your sink or a large container.
Submerge the racks and filters in this solution and let them soak for at least 15-20 minutes. This helps loosen any stuck-on food particles and grease. After soaking, use a non-abrasive sponge to scrub them gently, paying extra attention to areas with heavy buildup.
3. Clean Interior Surfaces With Vinegar Solution
Mix equal parts of white vinegar and water in a container. Use this solution to wipe down the interior surfaces of the dishwasher, including the walls, door, bottom, and especially the spray arms and detergent dispensers.
The vinegar solution effectively removes grease and mineral deposits and helps neutralise odours. Thoroughly cleaning the spray arms to ensure they are not clogged with any food particles, which can affect the dishwasher’s performance.
4. Run An Empty Hot Wash Cycle
After manually cleaning the dishwasher, place the racks and filters back in and run an empty cycle at the highest temperature. This helps flush any residual cleaning solution and sanitises the interior. Ensure there’s no detergent added during this cycle.
How to Deep Clean Refrigeration Units
Keeping your refrigeration units clean is crucial to food safety and can prevent costly repairs. Deep cleaning goes beyond simple wiping, involving thoroughly cleaning all compartments, surfaces, and components. This process ensures optimal performance and maintains the freshness and longevity of the food.
What You’ll Need:
- Soft Bristle Brush or Sponge: These are gentle on surfaces, preventing scratches while effectively removing dirt and grime from refrigeration units.
- Bucket or Sink: Necessary for mixing cleaning solutions and soaking parts like shelves and bins.
- Microfiber Cloths: Microfiber cloths are excellent for drying surfaces without leaving lint or streaks, ensuring a clean, polished finish.
- Cooler: To maintain food safety, a cooler is essential to keep perishable items at the right temperature while cleaning the refrigeration units.
- Mild Detergent or Dish Soap: Effective for removing grease and food residues without being too harsh on the refrigeration unit’s surfaces.
- Baking Soda: A natural deodoriser and a mild abrasive, perfect for tackling tough stains and neutralising odours without damaging surfaces.
- Sanitizer Solution: It’s important to not only clean but also sanitise surfaces to eliminate bacteria and ensure food safety.
Once you have your cleaning equipment and agents, follow these steps on how to deep clean refrigeration units:
1. Empty The Units
Begin by removing all food items from the refrigeration units, and transferring them to a cooler to keep them at a safe temperature. This ensures that you have clear access to all surfaces for thorough cleaning.
2. Safety First – Disconnect Power
For safety, unplug the refrigeration units before starting the cleaning process. This prevents any electrical hazards while cleaning.
3. Dismantle And Clean Shelves And Bins
Remove all shelves, bins, and other removable parts. Clean them separately in a sink or large bucket with warm soapy water. Use a soft bristle brush or sponge to remove any residues or buildup.
4. Clean Interior Surfaces With Baking Soda Solution
Mix water with baking soda and use it to clean the interior surfaces of the refrigeration units, paying special attention to corners and crevices where mould and bacteria can accumulate.
5. Sanitising And Rinsing
After cleaning, apply a sanitiser solution to all interior surfaces to kill any remaining bacteria. Follow up by wiping down with clean water to remove any traces of the sanitiser. Dry all surfaces thoroughly with microfiber cloths to prevent water spots and mould growth.
6. Reassemble And Power Up
Once all parts and the interior are completely dry, reassemble the shelves and bins. Restore power to the unit, and return the food items to their respective places, ensuring everything is organised and easily accessible.
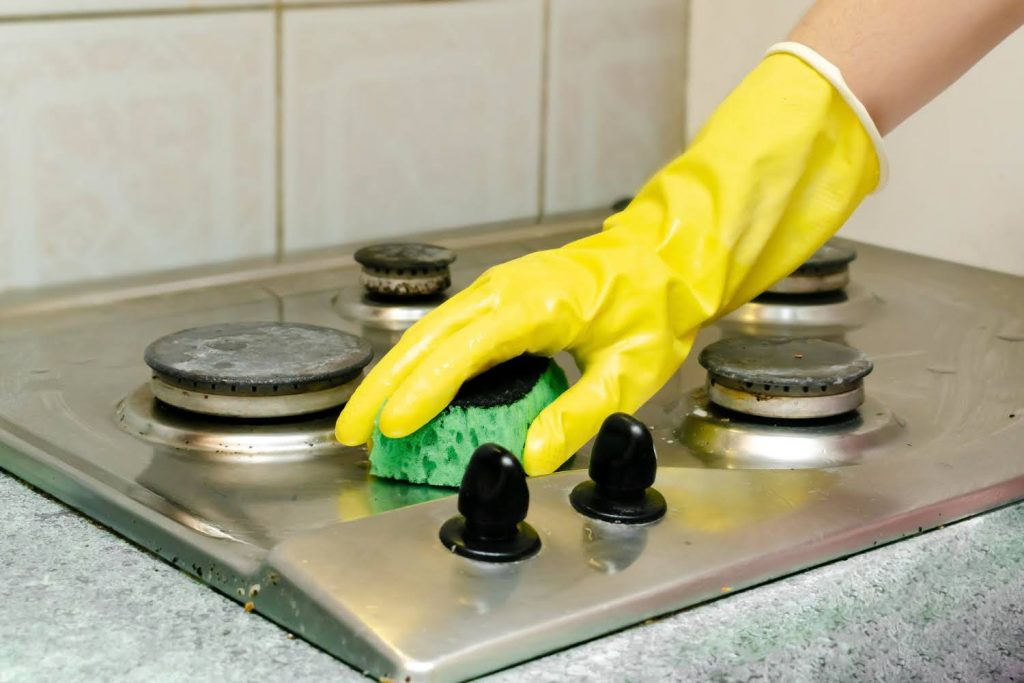
How to Maintain Cooking Ranges and Ovens
The heart of any commercial kitchen lies in its ability to cook food to perfection, and this is largely dependent on the condition of cooking ranges and ovens.
Regular deep cleaning removes grease buildup, prevents flavour transfer, and ensures even cooking. It also helps to extend the life of your equipment and reduce the risk of kitchen fires.
What You’ll Need:
- Non-Abrasive Scrubbing Pad: These pads are effective for scrubbing away dirt and grime without scratching the surfaces of your oven and cooktop.
- Commercial-Grade Oven Cleaner Applicators: Designed to apply oven cleaners safely and effectively, these tools ensure even coverage and help protect your hands from harsh chemicals.
- Protective Gloves: Essential for safeguarding your hands against chemical burns from cleaning agents, especially when using commercial oven cleaners and degreasers.
- Scouring Pads: These are useful for tackling hardened food residues and heavy grease buildup, providing the abrasive action needed without damaging surfaces.
- Commercial Oven Cleaner: Specifically formulated to break down baked-on food and grease, making the cleaning process more manageable and effective.
- Degreaser: A degreaser is essential for removing oily and greasy residues from cooktops and burners, ensuring a thorough clean.
- Glass Cleaner (if applicable): Specialised glass cleaners are needed to clean oven windows without leaving streaks, ensuring clear visibility and a polished look.
Here are the deep cleaning procedures you must follow:
1. Disassemble Removable Parts
Start by removing grates, burners, racks, and other removable parts from the oven and cooktop. This provides better access to all areas and allows for individual cleaning of each part.
2. Apply Oven Cleaner To Interior Surfaces
Using commercial-grade oven cleaner applicators, apply the oven cleaner to the interior surfaces. Follow the product’s safety instructions carefully, ensuring adequate ventilation and wearing protective gloves. Allow the oven cleaner to sit for the time specified by the manufacturer to break down the residue.
3. Degrease Cooktop And Burners
Apply a degreaser to the cooktop and burners. Use a non-abrasive scrubbing pad or a scouring pad for tough grime. Scrub thoroughly to remove all grease and buildup. Pay special attention to areas around the burners where grease and food particles accumulate.
4. Clear Venting Areas
Check and clean the venting areas of the oven and cooktop. Use a small brush or a vacuum cleaner to remove any blockages or debris. Keeping these areas clear is crucial for proper ventilation and oven function.
5. Rinse and Dry All Parts
After cleaning, rinse all parts thoroughly with water to remove all traces of cleaning agents. It’s important to ensure that all cleaning solutions are completely washed off to prevent any chemical taste or smell during cooking. Dry all parts with a clean cloth before reassembling.
6. Reassemble and Test
Once everything is clean and dry, reassemble the oven and cooktop. Restore power and test to make sure everything is working correctly. Use a glass cleaner to finish off with a streak-free shine for oven windows.
Monthly Deep Cleaning For Restaurants
Once a month, you need to do a big clean to reach all the spots that are easy to miss in daily and weekly cleaning. This deep clean helps keep your restaurant in great shape and ensures it’s a clean place for your customers to enjoy.
How To Clean Restaurant Hoods
Kitchen hoods play a vital role in air quality and fire prevention in your kitchen. A monthly deep clean of the kitchen hood maintains cleanliness and ensures that your kitchen functions safely and efficiently.
The process below will help you tackle the excess grease particles and grime accumulated over time.
What You’ll Need:
- Degreasing Solution: A strong degreasing solution is crucial for effectively breaking down and removing the heavy grease and grime that typically accumulate in kitchen hoods and filters. These solutions are formulated to cut through tough grease, making the cleaning process more efficient.
- Nylon Brushes: Nylon brushes are durable and versatile for scrubbing. They are tough enough to remove hardened grease but gentle enough not to scratch metal surfaces, making them ideal for cleaning the interior of hoods and filters.
- Protective Gloves: When working with degreasing solutions and doing heavy-duty cleaning, wearing protective gloves is essential. They protect your hands from harsh chemicals and prevent skin irritation.
Here’s a step-by-step guide on how to clean restaurant hoods:
1. Dismantle And Soak Filters
Begin by carefully dismantling the filters from the hood. Soak them in a solution of hot water and degreaser. The hot water helps to soften the grease, and the degreaser works to break it down. Allow the filters to soak for a sufficient amount of time, typically 15-30 minutes, depending on the level of grease buildup.
2. Scrub Interior Surfaces Of The Hood
While the filters are soaking, use a nylon brush to scrub the interior surfaces of the hood. Apply degreasing solution to the areas with grease buildup. Pay special attention to the crevices and corners where grease and grime tend to accumulate. Scrub thoroughly to ensure all grease is removed, as this buildup can be a fire hazard if left uncleaned.
3. Thorough Rinsing Of All Components
After scrubbing, rinse all components thoroughly with hot water. It’s important to remove any remaining cleaner residue, as leftover degreaser can be a safety hazard and may affect the taste of food. Ensure that the water reaches all nooks and crannies to completely rinse away the degreaser.
4. Dry And Reassemble The Unit
Use a soft cloth to dry all parts of the hood and the filters. Ensure that they are dry before reassembling. When reassembling, check that all parts are secure and correctly placed for the safe and efficient operation of the hood.
How to Clean Grease Traps
A grease trap is essential for trapping oils and fats that could otherwise cause blockages and odours in your waste system. Regularly maintaining your grease trap is not just a regulatory requirement; it’s also a critical measure to prevent backups and keep your kitchen running smoothly. The following steps will guide you through the process of effectively cleaning your grease trap to ensure it operates at peak performance.
What You’ll Need:
- Grease Trap Vacuum or Scoop: These tools are essential for efficiently removing the accumulated grease and oils from the grease trap. A specialised vacuum can quickly and effectively suction out the contents, while a scoop can be used for manual removal.
- Stiff-Bristle Brush: A brush with stiff bristles is necessary for thoroughly scrubbing the interior of the grease trap. It’s effective in dislodging and removing greasy residue and buildup that can cling to the sides and bottom.
- Grease-Cutting Cleaner: This type of cleaner is specifically formulated to break down grease and oil, making it easier to clean and ensuring that the grease trap is thoroughly sanitised.
- Boiling Water: Boiling water is used as a final rinse to flush out any remaining grease and debris, helping to clear the pipes and remove any residue left from cleaning.
Here’s a detailed cleaning procedure for grease traps:
1. Careful Opening Of The Trap
Start by carefully opening the grease trap to avoid spillage of its contents. It’s important to do this step gently to prevent any splashing or spreading of the waste material.
2. Removal Of Grease And Oils
Utilise a grease trap vacuum or a scoop to remove the built-up grease, oils, and other materials from the trap. If using a scoop, ensure to remove as much of the contents as possible, reaching into all areas of the trap.
3. Scrubbing The Interior
Once the bulk of the grease is removed, apply a grease-cutting cleaner to the interior surfaces of the trap. Use the stiff-bristle brush to thoroughly scrub the trap, focusing on areas with significant buildup. This step is crucial for removing the smaller particles and greasy residue that the vacuum or scoop might have missed.
4. Flushing With Boiling Water
After scrubbing, flush the trap with boiling water. This helps to rinse away any remaining cleaner and loosens any remaining grease, ensuring the pipes are clear. It also helps to sanitise the trap.
5. Reassembly And Tightening
Once the trap is clean and rinsed, reassemble all the parts. Ensure that everything is tightly fitted and sealed to prevent leaks. Proper reassembly is important to ensure the grease trap functions correctly and efficiently.
How Much Does It Cost To Deep Clean A Restaurant Kitchen?
Are you considering hiring a professional commercial cleaning service to deep clean your restaurant kitchen?
In Singapore, the cost of deep cleaning a restaurant kitchen can vary, but you can generally expect to pay between SGD 500 to 1,500, depending on the size of your kitchen and the extent of cleaning required.
With the help of professional commercial cleaners, you can uphold the highest standards of cleanliness and hygiene, prolong the lifespan of your kitchen equipment, and even increase efficiency, which is essential for any restaurant.
Why Hire Professional Commercial Cleaners?
Professional commercial cleaners come equipped with industrial-grade equipment and specialised knowledge to tackle the toughest grime, ensuring a level of sanitation that regular staff may need help to achieve. They also provide dishwashing services to ensure the highest hygiene standard for your kitchenware.
They are trained to handle heavy-duty cleaning tasks swiftly and effectively, often during off-hours, to avoid disrupting your business operations, ultimately contributing to a healthier environment and potentially reducing the risk of foodborne illnesses.
ESP Cleaning Services provides commercial cleaning services at competitive rates, guaranteeing your restaurant kitchen stays spotless and operational. Let our team of experts give your restaurant the deep clean it needs.
Conclusion On How To Deep Clean A Restaurant
Maintaining a clean restaurant is essential for customer satisfaction, health standards compliance, and operational efficiency. These routines are the backbone of kitchen hygiene, from daily sanitisation of high-touch areas and thorough weekly dishwasher maintenance to the meticulous quarterly cleaning of grease traps.
While your internal staff can handle routine cleanings, the deep cleaning of a restaurant kitchen is a job for professionals. For comprehensive commercial cleaning services and office cleaning services, contact ESP Cleaning Services for a non-obligatory quotation.
Frequently Asked Questions About How To Deep Clean A Restaurant
What Are The Signs That My Restaurant Needs Deep Cleaning?
Signs that indicate the need for deep cleaning include persistent unpleasant odours, visible grime buildup in kitchen equipment, increased pest sightings, and difficulty maintaining cleanliness during routine operations.
What Should I Look For When Choosing A Professional Commercial Cleaning Service For My Restaurant In Singapore?
When selecting a professional commercial cleaning service, look for companies with experience in the food service industry, positive client testimonials, and a clear outline of their cleaning protocols. Additionally, ensure they use cleaning agents that are effective yet safe for food preparation areas.
How Long Does It Take To Deep Clean A Restaurant Kitchen In Singapore?
The time taken to deep clean a restaurant kitchen in Singapore varies depending on the size of the kitchen and the level of detail required, but it typically ranges from a few hours to an entire day.
How Often Should A Restaurant In Singapore Undergo Deep Cleaning?
Restaurants in Singapore should schedule deep cleaning every month at a minimum, with specific areas requiring more frequent attention due to health regulations and the humid climate, which can encourage bacterial growth.
Are There Any Specific Regulations In Singapore Regarding Restaurant Hygiene That Affect Deep Cleaning?
Yes, Singapore has stringent Food Hygiene Regulations managed by the Singapore Food Agency (SFA), which mandate regular cleaning schedules, proper sanitation procedures, and other hygiene practices that must be adhered to during deep cleaning.
What Are The Benefits Of Using Eco-Friendly Products For Deep Cleaning My Restaurant In Singapore?
Using eco-friendly cleaning products helps reduce environmental impact, ensures the safety of food surfaces, and improves indoor air quality, which is crucial for the comfort of employees and customers in Singapore’s humid climate.